We’ve spent the last three years living in our motorhome full time. It’s been a huge change for me, getting used to the lack of space and storage, but it’s been incredibly rewarding too.
Disclosure: This article contains affiliate links. When you click on these links I get a small commission if you decide to make a purchase, with no cost to you. I only display products that I used myself, that I consider being of good quality. I only recommend products or services that I feel deliver value to you.
There was a long period of time where I really struggled. My family home has been the same for 30 years, my hometown my family, all the same where I left them. And here I am, opting for a life that changes by the week. (ok cowgirl, slow down). But in all seriousness, the motorhome was great, but I felt like I was “staying” in someone else’s space, never really able to relax and just feel comfortable.
So, this fall (our off-season from racing), we decided to do the renovation that I have been dreaming about since the day we got the motorhome 2 years ago. It was such a fun experience, my father built our home, barn, and garage, and was able to teach this trade to my husband Ronnie. Watching them figure out solutions to problems and building a bond together made for an unforgettable experience. My mother and I shopped for goods and fabric together, she taught me how to make the drop cloth curtains, throw pillows, and table napkins. (Yes, I’m “that girl” who has fabric table napkins for fancy dinners in her RV).
All in all, the renovation was hard work, we had to go back and forth between renovation and our daily job, but it was so worth it in the end.
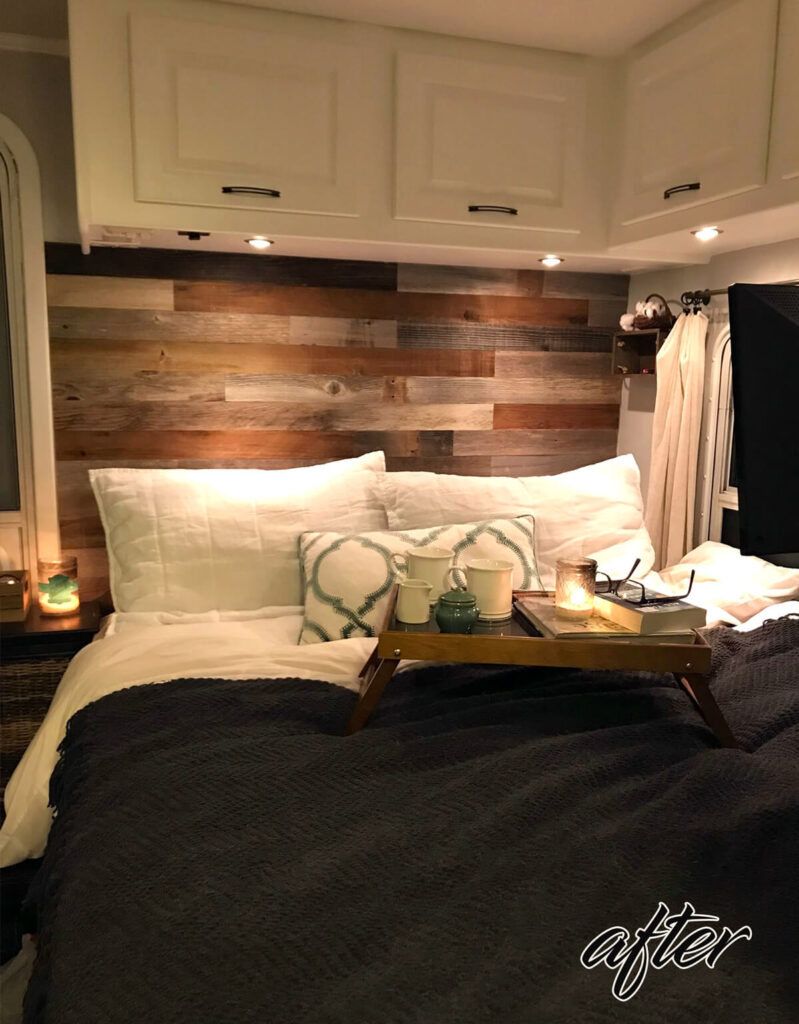
If you’re thinking of doing a renovation here are a few details from our RV bedroom renovation to give you some inspiration.
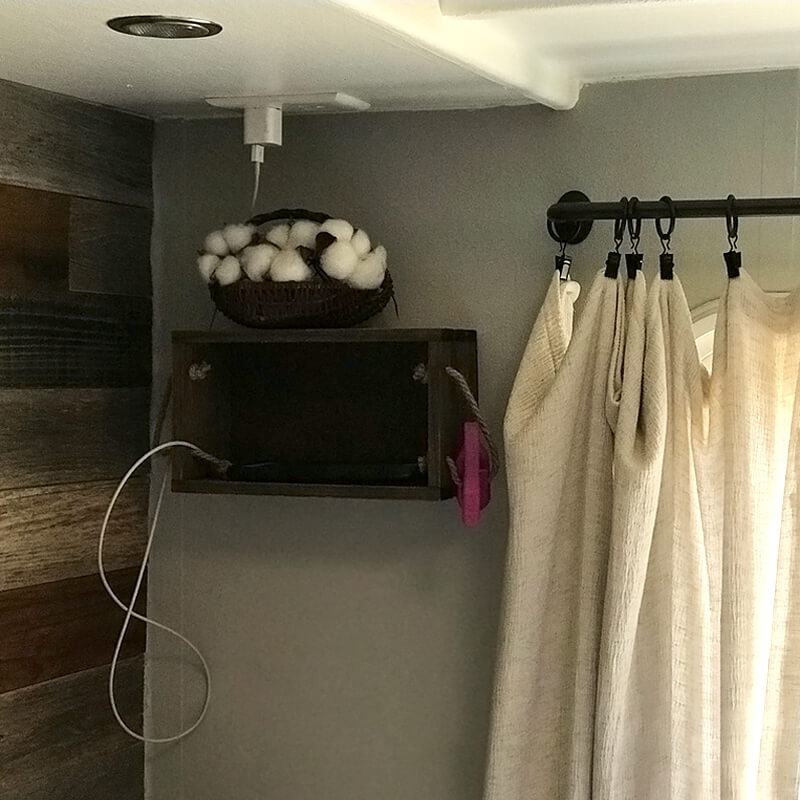
When doing the renovation, I found another outlet plug on my side of the bed. SCORE! But I had to find a solution to storage because there’s no nightstand on this side. So, I bought a small wooden box and used command strips to attach it to the wall. I’ve attached it bottom-to-wall so I can easily take my phone in and out, like a little shelf.
This is a good time to get some updated bedding that goes with your new look. We got ours as a wedding gift, but there are some great down comforters and duvets here.
We removed the window valances with a few tools and the difference is amazing! We have so much light coming in now. I like the look of curtains over the blinds so, we installed a nice bronze colored rod (this also matches the cabinet handles and fixtures- it’s the little details J). The rods are adjustable to all three window sizes (this is something you need to consider before ordering). I went with clips for a nice clean drop cloth curtain; easy to install, easy to take off to clean.
We used Behr paint for our RV renovation. The white we used on all the cabinets throughout the RV, the gray we used on the walls (the white and gray together made things three dimensional), and the mocha on the kitchen and bathroom cabinets only to add a little contrast.
I will add a post in the future with more details on painting, but here are a few tips before you start.
- Take all the cabinets and hardware off
- Clean the wood and wall with simple green.
- Sand the wooded area (cabinets) lightly.
- Use a good primer, we used the Zinsser For All Surfaces.
- Cut the edges first and then roll the rest of your space with a roller.
- I say it’s best to do two coats.
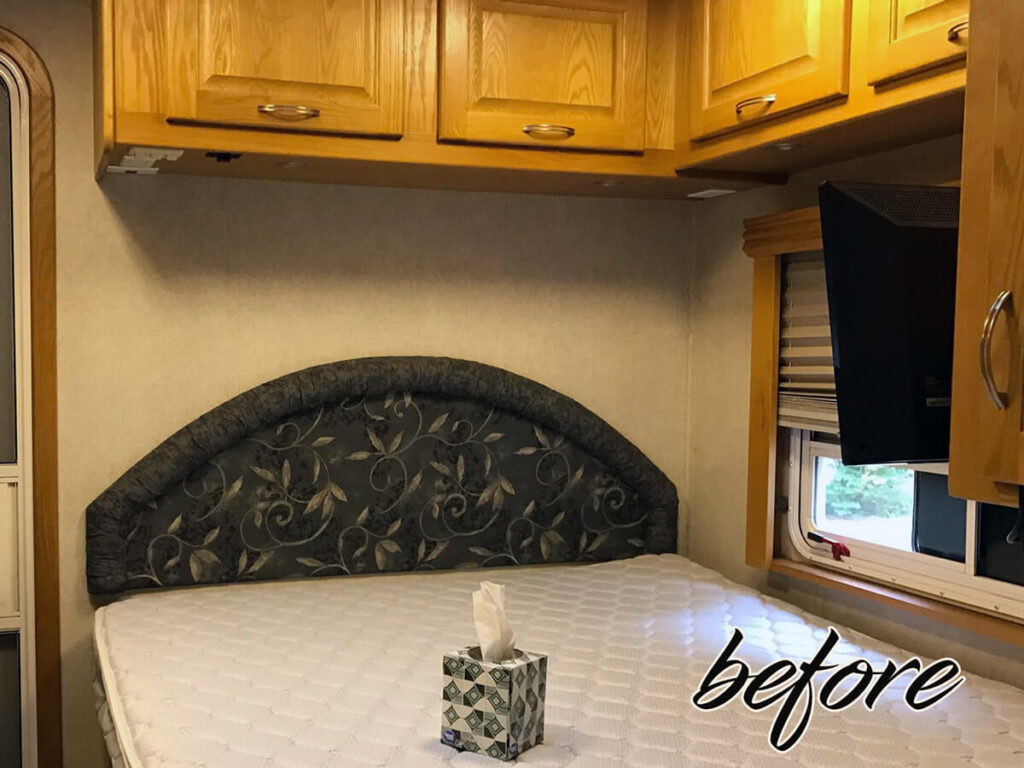
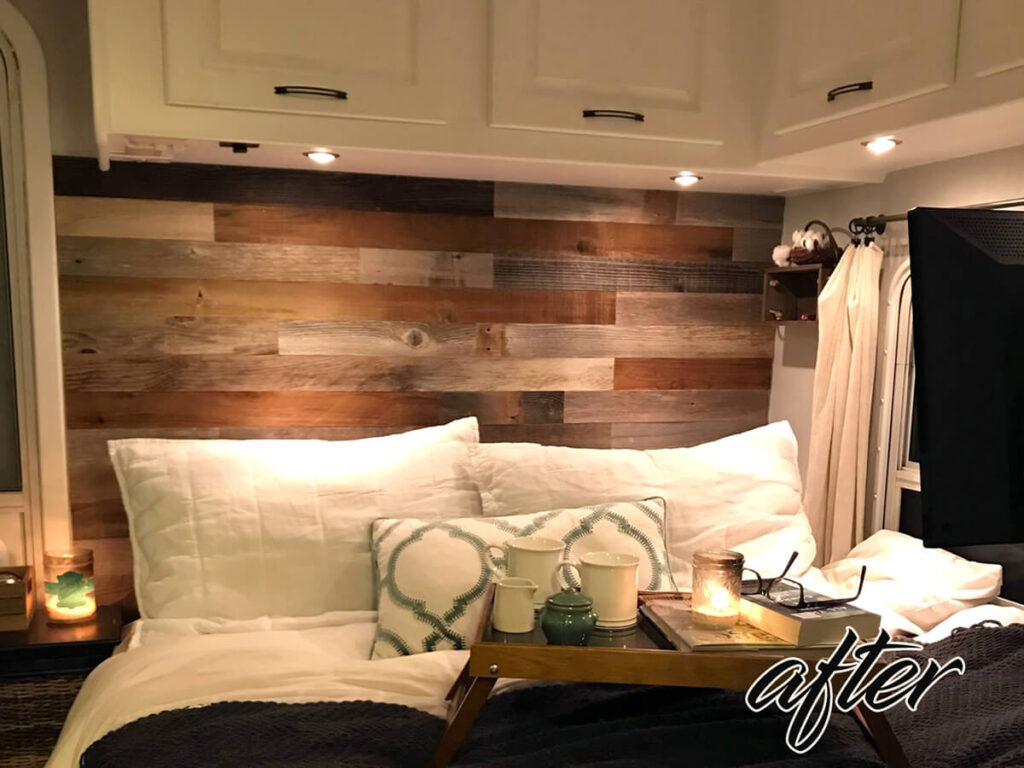
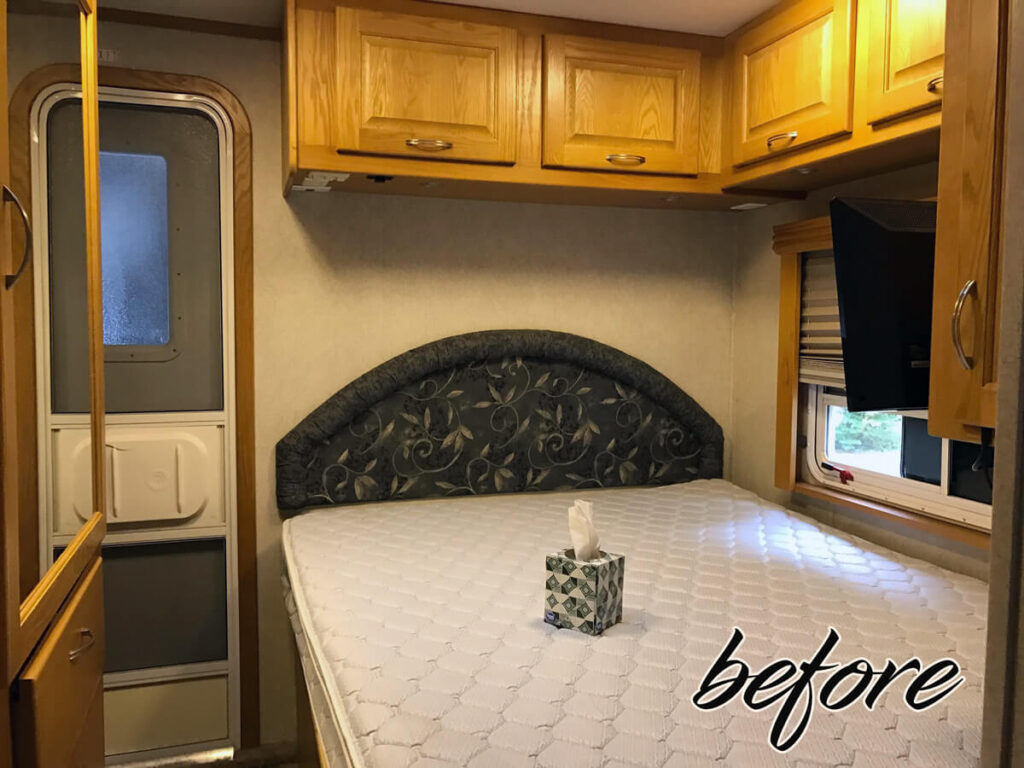
I’m so happy we did the reclaimed barn wood accent wall. We use to have an ugly headboard and I always wanted to get that thing out! The reclaimed wood that I went with was a bit expensive but definitely worth the price. In an RV, you have to consider weight restriction and our bus was right at that point before the reno, so my goal was to take weight out of it. The reclaimed barn wood was a great solution as it was cut thinner than normal barn wood and has durable sticky backings.
A few things to consider when installing the wood:
- Make sure the mattress has been removed prior to installation. But mark on the wall where the mattress comes up to. You will want to install the wood a row or two down from that. (I measured this out before-hand so I knew how much wood to order- it’s done by square footage).
- Some of the background may show, so it’s good to paint behind the accent wall too, unless you want the old color to show.
- Take the wood out and inspect if you have damaged pieces put those to the side and contact the company.
- Lay the pieces out on the bed frame, lay them out as you would on the wall, putting pieces together that flow well into each other. I liked the mix matched look, I did not want the same color woods next to each other.
- Once you are ready to install lay your first one down, we started in the top right corner as it had to be cut to fit around the cabinet. You will have three sizes; long, medium, and short pieces. As you go across you may need to cut boards to fit, but keep those small pieces you will use them to fill in in other areas later on.
- Make sure you give a little bit of space between each row, don’t try to jam them in tight. Remember you are in an RV, the walls move and flex, you need to give the wood a bit of room to flex too.
A few last-minute takeaways. Make sure you factor in your overall quantity before ordering a product. We used the same curtain rods (adjustable for all windows), clips (you won’t need the same number of clips for each window smaller you will use less and larger you will use more- consider this when calculating your quantity), and paint throughout the RV.
I hope these tips have been helpful. Are you interested in renovating your RV, tiny home, or even just your space at home? Let me know what you’re up to in the comments below, and let me know if I can help in any way!